SNOdar + Chairlift Gateway Migration Guide
Purchase on our web shop: SNOdar + Chairlift Gateway Bundle
Brief
This document provides detailed instructions to migrate your SNOdar and LTE Chairlift Gateway over to the new Dashboard and Backend, SNOfire Chairlift Dashboard, from the existing legacy Dashboard, SNOdar Dashboard.
New sensing metrics (e.g. Temp/Pressure/Humidity/Air Quality), lower data rates, Over-the-Air (OTA) firmware upgrades for both devices, seasonal data downloads, and new plotting and rendering are all available on the new Dashboard!
Create an Account on the new Dashboard and follow the instructions below. You will need to access your field units and use the Mobile App to complete. Once within Bluetooth (BT) range, the process should only take 10-15 minutes.
Dependencies
- SNOdar Firmware: snodar-v0.9.4 to force Gateway update
- SNOdar Firmware: snodar-v1.0.0 to migrate to new dashboard
- Mobile App:
SNOdar Snow Depth v0.4.6or later (update this in your mobile app store of choice)
| Google Play Store App | iOS App Store |
|---|---|
Migration Steps
Warning
Following the steps below in order is critical!
- Natural SNOdar Firmware Update to v0.9.4
- Force Gateway Firmware Update
- Set Serial Number
- Enable Developer Mode
- Manual SNOdar Firmware Update to v1.0.0
- Set the Cloud Enable Icon
- Claim Serial Number on new Dashboard
1. Natural SNOdar Firmware Update via Mobile App
a) Get within BT range of both the SNOdar and Gateway units, ≤ 20 meters.
b) Connect to the SNOdar using the Mobile App via BT.
c) Check for the latest updates and update naturally, using the FW update dropdown, to the most current cloud released firmware: snodar-v0.9.4
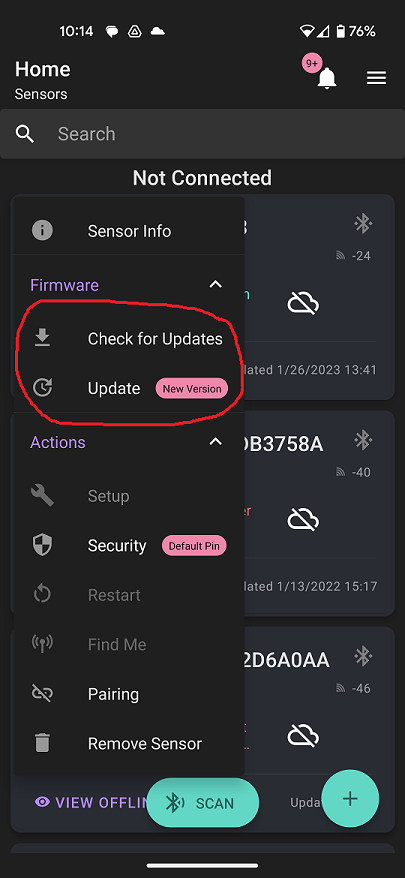
d) Once it successful updates and has rebooted, reconnect via the mobile app.
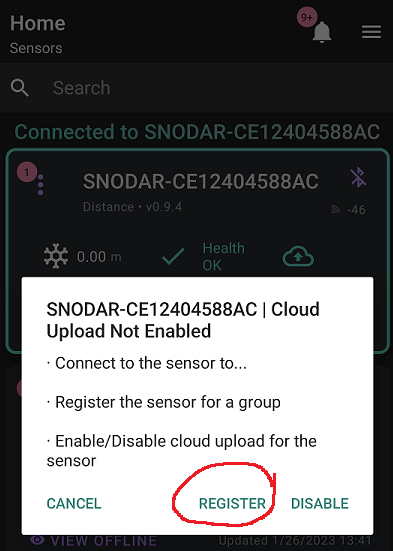
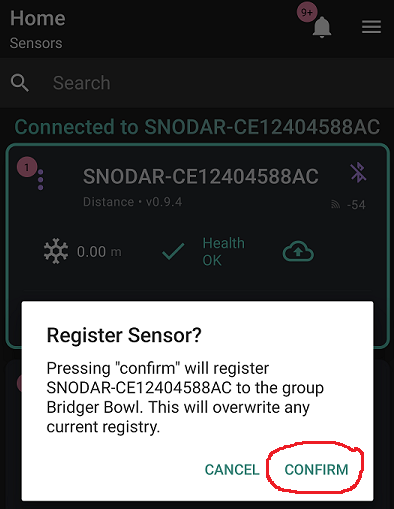
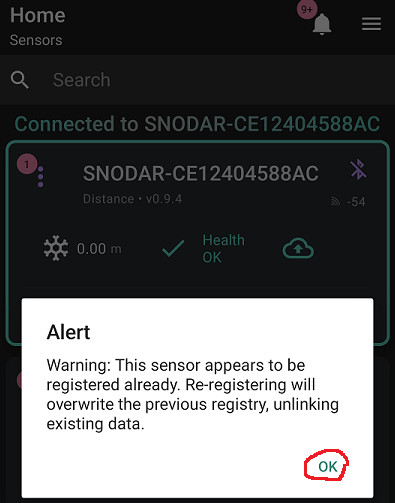
2. Force Gateway Firmware Update
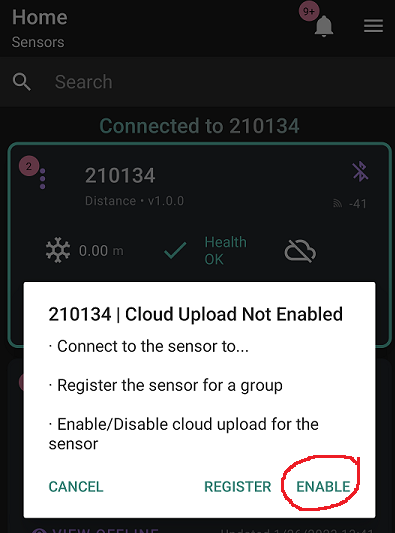
a) Click on the white/green Cloud Icon and a message appears to either Register or Enable.
![]()
b) Click the Register button to force the Gateway to upgrade firmware. This will allow the Gateway to access the new server endpoint and download its latest firmware. Continue to click Confirm on the next page and OK on the Alert Page.
Note
Ignore any alerts about an “active group link key” or “Cloud Mobile Link” as this is depricated functionality and messaging.
| Register | Confirm | Alert |
|---|---|---|
 |
 |
 |
c) Watch the Gateway LEDs, as the BLE LED will breifly go Cyan then turn Magenta while it is downloading firmware. The download will take 4-8 minutes. If it is successful the unit will reboot itself, so both LEDs will turn OFF then come up as Red. The LTE LED should go Green in less than 30 seconds.
d) If the unit immediately reboots after initiating this process or the LEDs both turn Yellow (Watchdog Reset), try Steps 1-3 again until it is successful.
3. Set Serial Number to Provision SNOdar
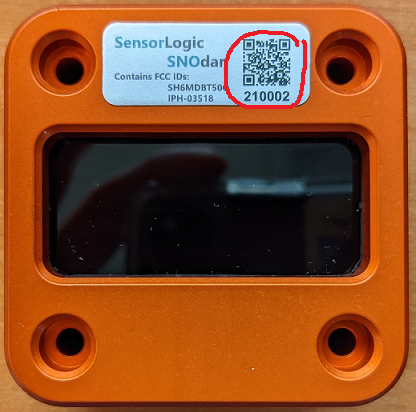
a) Now you must rename the SNOdar in the App to the given Serial Number on the bottom of the unit next to the QR code. The SN will be a 6-digit number with the following format: 210<xxx>.
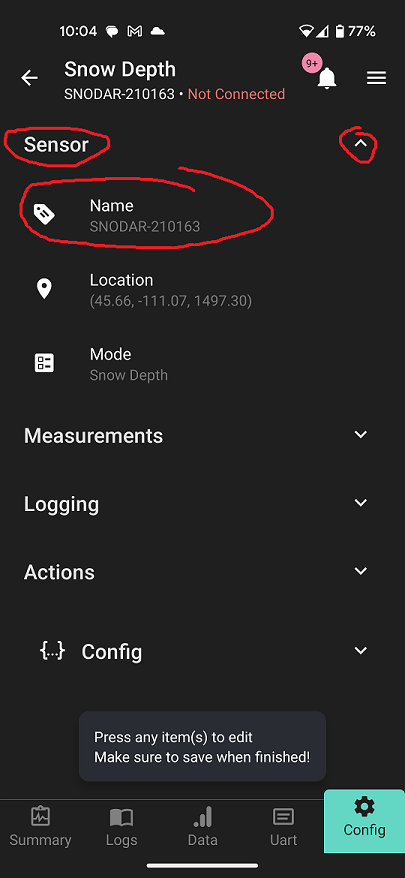
b) Again, open the specific SNOdar and navigate to the Config page.

c) Choose the Sensor dropdown then Name and type in the 6-digit serial number from the bottom of the unit. Hit Save.
d) Reboot the unit from the mobile app.
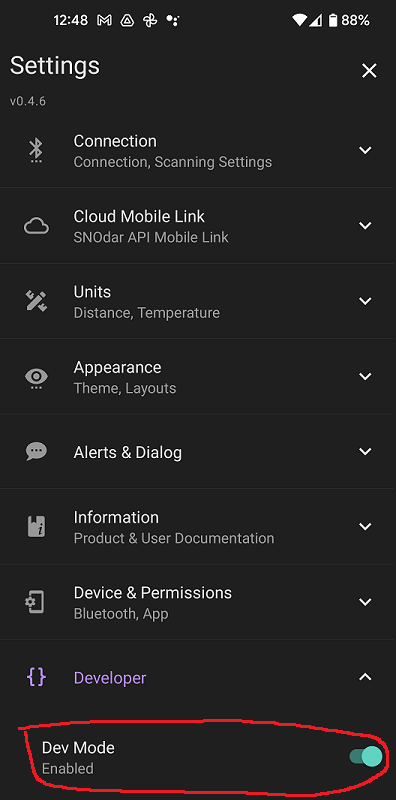
4. Enable Developer Mode
a) Click on the main mobile app Settings menu in the upper right corner.
b) You will notice the mobile app version, v0.4.6, in the upper left corner. Click on this until it tells you Developer Mode is enabled (20+ times).

c) Go to new {} Developer dropdown and enable Dev Mode with the toggle switch.
5. Manual SNOdar Firmware Update via Mobile App
a) Download the new SNOdar FW snodar-v1.0.0 to your mobile device.
Note
Some mobile device settings require you to rename the firmware file before it can be visible by the Mobile App when choosing the file.
Note
The manual FW feature in the SNOdar Mobile App can only be done with an Android device at this time. If using an iOS device, download the nRF Toolbox app to manually apply the v1.0.0 FW update; otherwise, skip to b) below.
- On your iOS device, install and open the nRF Toolbox App
- Toward the bottom of the left side of the screen choose
DFU- Choose the
Connectbutton on the right side- Hit the refresh icon at the upper right of the screen to see the SNOdar device
- Choose the SNOdar from the list
- Click
Browseand choose the v1.0.0 downloaded firmware file- Click
Updateto start the firmware update, then continue to d) below
b) Start the Mobile app and connect to the SNOdar. Open the specific SNOdar and navigate to the Config page.
c) Under Actions dropdown choose Manual Firmware Update then choose the <fw_name>_v1.0.0.zip FW file you downloaded (and potentially renamed) in Step 1.
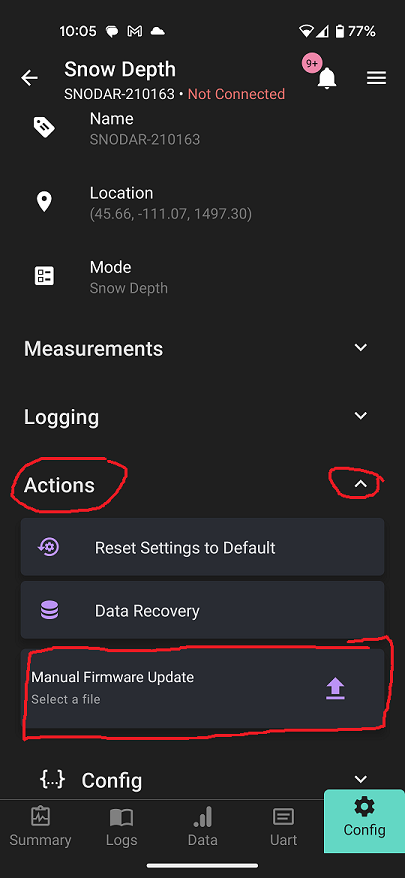
d) Let this process complete, and the SNOdar will reboot and the LEDs will flash Green indicating successful diagnostics upon boot.
6. Set the Cloud Enable Icon to Green
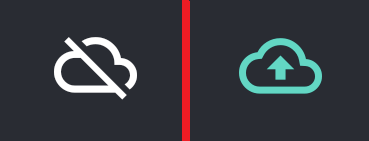
a) Reconnect to the SNOdar via the mobile app and toggle the Cloud Icon button again and choose Enable so data will be automatically sent to the backend database.
b) The Cloud Icon will turn Green.
c) Reboot the unit from the mobile app.
7. Claim Serial Number on new Dashboard
a) Navigate to the Chairlift Dashboard and log in to your account (or Create an Account).
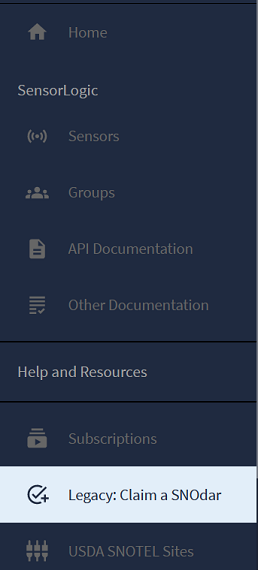
b) Navigate to the Legacy: Claim a SNOdar page, see the left side nav bar.
c) Enter the 6-digit Serial Number and hit Go.
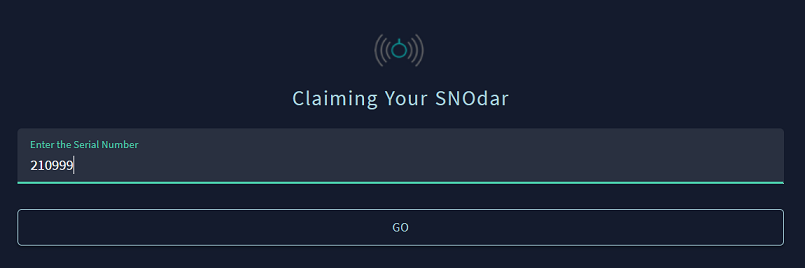
d) Your SNOdar should be claimed and viewable on the new Dashboard within 12-24 hours.